How to Fly a Drone – the Complete Guide
In this guide we will cover all of the foundation knowledge needed to help you understand how to fly a drone correctly and legally, as well as teaching you the techniques needed to become a proficient drone pilot. Is drone flying difficult? It doesn’t have to be, so read on and quickly learn how to fly like a pro.
All you need to become a competent and confident drone pilot
This guide doesn’t just cover how to fly a drone for beginners. Experienced drone owners, are you honestly really happy with your flying skills? Have you ever forgotten to update firmware, or suffered interference in flight? Follow this guide to learn how to fly a drone to its full potential, and make sure you cover all of your flight prep properly to avoid any mishaps once in the air.
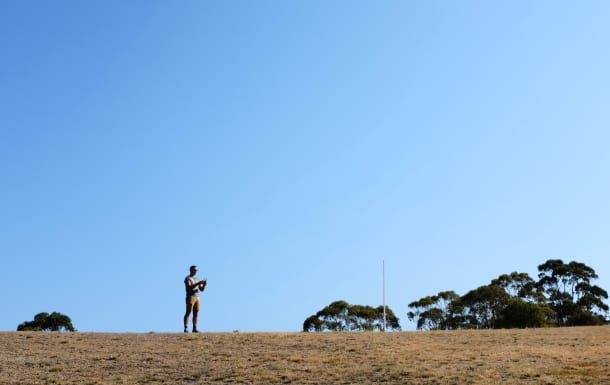
If you are anything like me, or many others, then you would have read the instruction manual of your new drone, taken to the skies as soon as your first battery is charged, and never looked back. Nothing wrong with that. These things are supposed to be flown, right? Once you are up and running with your drone, it’s very difficult to motivate yourself to take time out to practise and master the fundamentals of flying…..especially when there are so many other things you could be doing like capturing better photos, racing on your homemade drone course, or mimicking your favourite movie drone shot:
The simple truth is that taking time out to learn the fundamentals and practice a few training drills will better prepare you for any issues that come your way. Even if you are experienced, it really helps to consolidate the fundamentals so you can rely on them when needed.
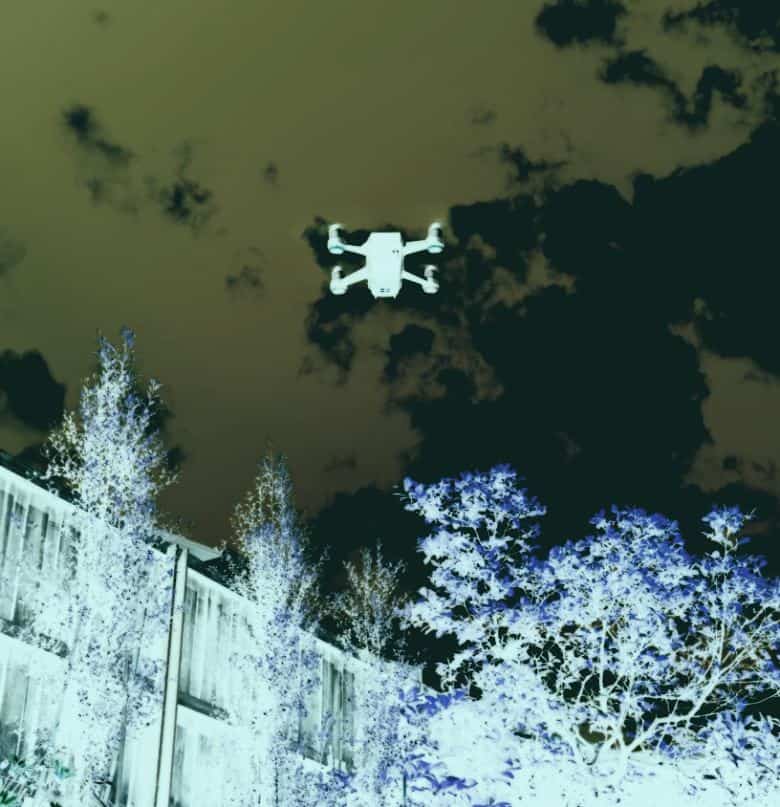
For example, I did not practicing flying my first drone without GPS, so when I lost GPS functionality one time, the drone drifted into a brick wall whilst I fumbled around in the settings menu! Had I have practiced this beforehand, I would have known what to expect and likely been able to correct the drones position, and not search pathetically for a menu setting!
Quick Links
What this guide will teach you
- Fundamental flying maneuvers
- What drone jargon actually means!
- The controls
- Common flight modes
- Rules for flying drones
- Different parts of a drone
- Safety precautions
- How to check whether a location is suitable for flying
- Environmental checks
- Equipment checks
- System checks
- The Pre-Flight Checklist
- How to put theory into practise with flight drills
- Flying in windy conditions
- Other drone flying tips
Preparation
If you are haven’t flown drones before, we recommend that you buy a cheap drone without GPS. Our article covering the best drones under $50 can help find something suitable. This will mean that you will have to make lots of small corrections to maintain altitude when flying, and to maintain a stable hover. This is a great way to learn how to fly -and feel how a drone behaves- and will serve you well if your GPS fails. Also, as long as the drone is cheap, you won’t mind as much when you crash!
Read the manual
Not trying to teach anyone how to suck eggs, but every drone manual I’ve ever read has had some hidden nuggets of useful info. From finding out how to reduce flying control sensitivity, to finding out the quirks of an automatic return-to-home system – you need to know your drone inside out.
Good beginner drones for learning to fly
With the exception of the racing drones, all other drones in this indoor drones article are good for learning how to fly.
Follow the link hereafter if you would like to know more about the best drone companies and manufacturers.
Register your drone and fly legally
If you own a drone, one of the first things you should do is register it. This is not required in all countries, so check this out wherever you are.
Drones over a certain weight are required to be registered in the US. Look at your drone’s specifications on the manufacturers website to find out your drones weight, then head over to the the FAA website (if in the US) and check if you need to register.
Once you are registered, you label your drone with the code that you are supplied and you are good to go.
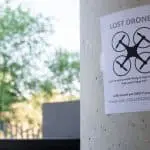
This is something everyone should do as it will be easier to locate your drone if it is lost, and registration makes users more accountable if they fly irresponsibly. It only costs a handful of dollars, so no excuses!
Jargon
FPV – stands for ‘First Person View’. This is the view from the drones main forward facing camera that is sent to your transmitter, and then to your viewing device – whether it be a smartphone, tablet or other. See below for an FPV taster:
UAV – stands for ‘Unmanned Aerial Vehicle’. The term ‘drone’ has been widely adopted and used in the consumer markets, whereas ‘UAV’ is the more commonly used term in Military markets. Space.com has a good definition of a UAV.
GPS – Another TLA….or Three Letter Acronym..!.. stands for ‘Global Positioning System’. GPS uses signals from multiple satellites to accurately establish position, speed and time. Watch the below video to learn more:
Drones with GPS functionality are able to hold their exact position with minimal drifting or movement, whereas a non-GPS drone will drift and lose altitude.
GPS also affords drones with various automatic flight modes enabling them to fly automatically to designated map positions.
Quadcopter – a Quadcopter is by far the most common type of drone. It has four rotors, each of which is able to vary it’s speed independently, thus enabling movement in different directions and rotation around different axis. Check out Wikipedia’s description here.
Ground effect – is the effect of additional lift and turbulence being generated when the drone is close to the ground. Ground effect can make a drone more difficult to control, so it’s pays to hover at least a few feet above the ground to avoid this effect.
Gesture control – Is a feature on some drones which enables the user/pilot to control the drone by waving your arms in different directions whilst the drone is facing you. The video below show gesture controls in action on the DJI Spark:
Return-to-home (RTH) – is a feature on some GPS drones which enables the drone to automatically fly back to a user configured ‘home point’. RTH can be used in various scenarios (depending on the drone model), such as when the drone loses signal for a predetermined period of time, and when the battery is running low. In these cases the drone will engage RTH and automatically fly back to the ‘home point’.
Tip
‘Return-to-home’ is a great feature but on some drones, collision sensors may not work whilst RTH is engaged. Even if your drones collision sensors function whilst RTH is active, they may not detect thin tree branches or power cables. To overcome these issues, some drones enable you to set a default altitude that the drone flies to when RTH is engaged. Set this to a good height, so once RTH is engaged, the drone ascends to this altitude and then flies over any obstacles on it’s way home
Visual Line Of Site (VLOS) – This simply means ensuring that your drone is visible, or within visible range at all times.
The controls
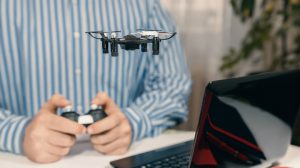
When learning how to fly, chances are the drone controllers/transmitters (we’ll call them ‘controllers’ from now on) you are using follow the same two stick layout. I’ll show you common designs below:
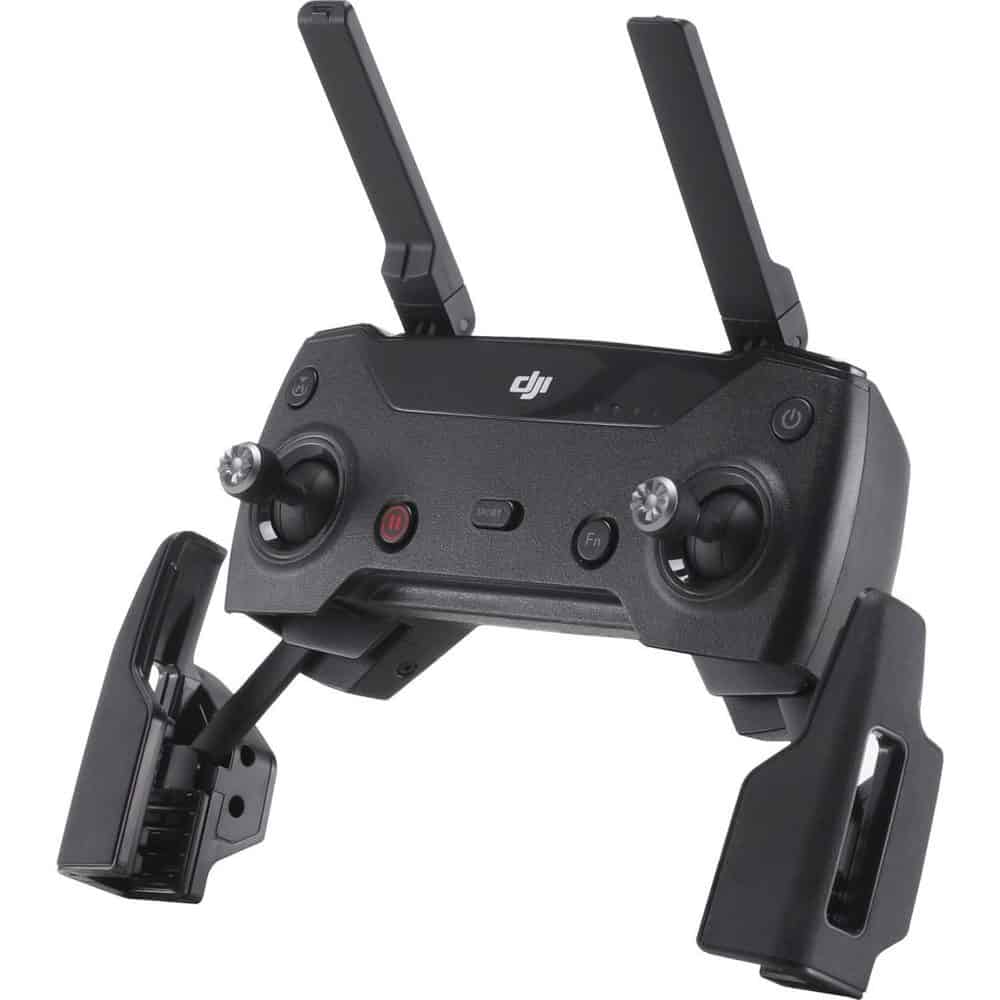
If you are flying a DJI Mavic or Spark, your controller will be similar to the below:
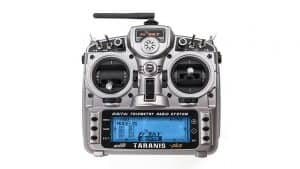
If you are flying a kit or racing, or if you have had to buy a controller for your drone, it could be similar to the below:
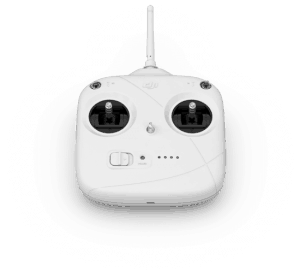
If you are flying a DJI Phantom (see here for further information on the DJI Phantom line), your controller will be similar to the below:
Left stick – Throttle
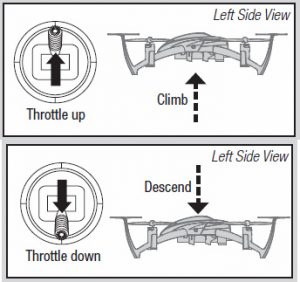
Throttle – This determines the altitude of the drone, and is usually controlled by the up/down motion of the left-stick. Pushing up on the left-stick will increase the throttle, and make the drone increase altitude/go up(!). Pushing down on the left-stick will decrease the throttle, and make the drone lose altitude/go down.
Left stick – Yaw
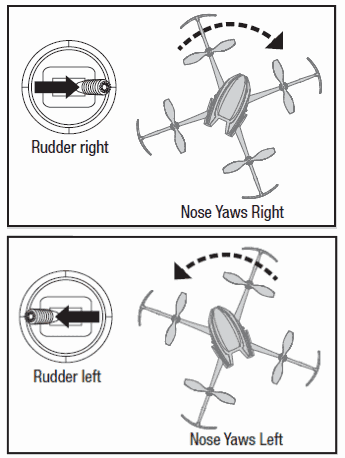
Yaw (‘rudder’ in aviation speak) – is the vertical axis of a drone. Rotation around this axis causes the drone to rotate clockwise or anticlockwise. Rotation around this axis is caused by the relative speed of the clockwise rotating rotors vs the anticlockwise rotating rotors.
Pitch, Roll, and Yaw:
Right stick – Roll
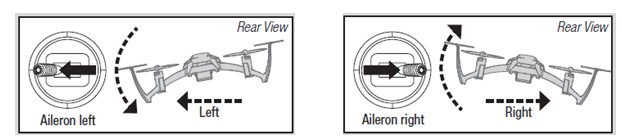
Roll is the longitudinal (front to back) axis of a drone. Rotation around this axis causes the drone to move sideways. Rotation around this axis is caused by the relative speed of the left and right rotors. E.g. slower left rotors (and faster right rotors) will cause the drone to rotate left/anti-clockwise around the roll axis.
Right stick – pitch
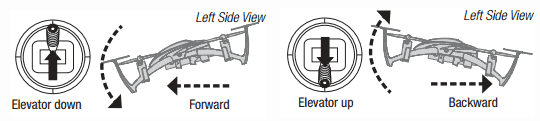
Pitch (or ‘elevator’) is the spanwise axis of a drone. Rotation around this axis causes the drone to move forwards or backwards. Rotation around this axis is caused by the relative speed of the front and rear rotors. E.g. slower front rotors (and faster rear rotors) will cause the drone to rotate forwards around the pitch axis.
Tip
If your drone has a gimbal (for smooth video footage), you may have a gimbal dial to tilt the camera up and down. For the sake of smooth video footage, it often pays to reduce the sensitivity.
‘Sports mode’ button
Your drone may have a ‘Sports’ mode, ‘Turbo mode’ or similar. Once these modes are engaged then the drone will fly significantly faster, often at the expense of battery life, precise control, and can often lead to crashes! Only engage such a mode if there are no trees or obstacles anywhere nearby, or if you are trying to fly against strong winds.
Video record and Shutter buttons
No prizes for guessing..!..
Flight modes
The following are some of the common flight modes to be found:
GPS hold/loiter mode – the drone will maintain location, altitude and heading when the sticks are released. Also, if the drone drifts, wanders, or is blown from its resting position, it will correct itself and return to that position.
Self level/stabilize mode – when you release the sticks, the drone will level out automatically, avoiding the need to do it manually. Needless to say, this makes flying easier.
Altitude hold mode – the drone will maintain current altitude whilst hovering or manoeuvring, and will only increase or decrease altitude if you increase or decrease the throttle.
Manual – the stick will tilt the drone in the desired direction, but it will not center itself and return to a hover automatically – it will keep on flying in the same direction until manually changed.
How to prevent flyaways
Flyaways are a drone owners worst nightmare. When learning how to fly, this can be a real nagging fear. Just imagine watching your $1000 dollar drone break signal and drift off into the sunset!
It seems that most flyaways are preventable however, which is great news, so read on….
Understanding the common causes of flyaways is the first step to avoid them happening to you:
- Loss of signal due to obstacles between drone and transmitter
- Interference from Wifi (built up areas), telecommunications towers, power lines etc.
- Compass interference (e.g. from large metallic objects)
- Flying in poor weather
- Motor failure
- Poor judgment
- Incorrectly setting up your drone
- Not updating firmware
- Flying out of range
- Flying too high
- Panic when encountering an unexpected control response
I have only ever suffered a single flyaway, due to compass interference, as I was stood close to a huge flood-light. I am convinced that I would have experienced more if I didn’t go through the following checklists before each flight:
If you don’t want to read or print the above lists just yet, digest the key checks below for now:
- Check that batteries are fully charged
- Check for rain, max wind speeds, number of satellites visible (if GPS drone) – I use uavforecast for this.
- Check that controller/transmitter is pairing with the drone properly
- Set homepoint
- Reset home point if you move to another location
- Recalibrate your compass before flight
- Monitor compass interference before and during flight. Stay away from large metallic objects that may affect compass.
- Check for signal interference DURING the flight, and land if interference is an issue.
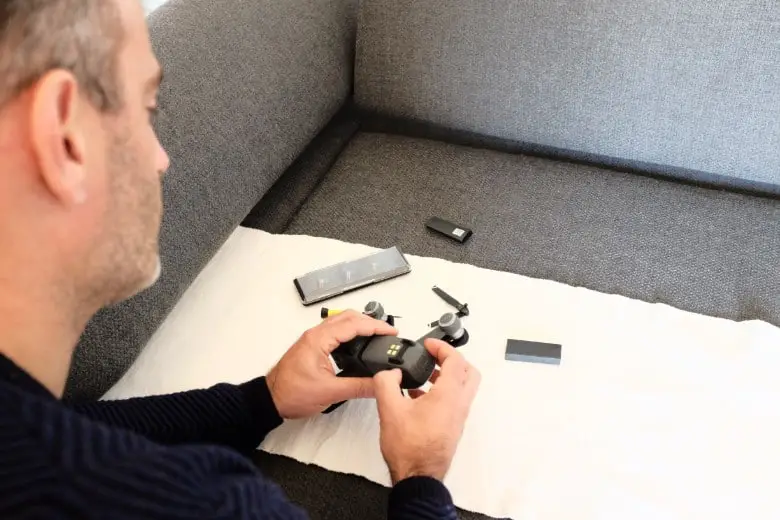
If all fails and the drone crashes, pick up all the fragments as some manufacturers will need them sent back if there is a known issue (helps with claim), or you have an extended warranty package (like DJI Care Refresh)
How to fly a drone legally
Different countries have different drone laws, so please check them out wherever you are. It’s important that you become familiar with the reg’s as soon as you start learning how to fly. We’ve listed sites for some countries below:
Canada rules – Government of Canada
As mentioned before, it is a requirement in the US that you register your drone with the FAA.
For US owners, the FAA website highlights Federal Drone laws applicable country wide. Additionally, it is important to check your States drone laws, to see if any additional rules apply.
The key rules are as follows
- Don’t fly above 400 feet
- Don’t fly over crowds of people
- Don’t fly within 5 miles of an airport
- Don’t fly near emergency response vehicles or events, such as fires
- Keep your drone within line of sight
- Don’t fly over stadiums or sports events
- Don’t fly near restricted airspace
- Don’t fly under the influence of drugs or alcohol
Get to know your drone
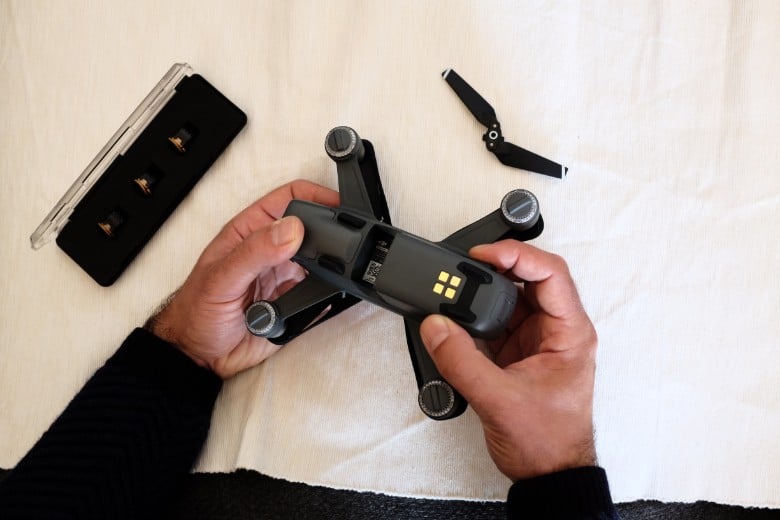
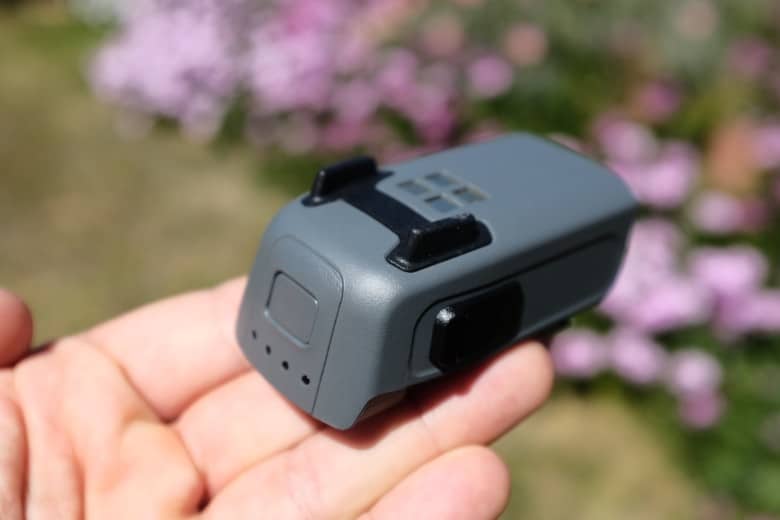
Battery – Lithium Polymer (LiPo) batteries are a key technology in drones. As with other aircraft, weight is a key consideration so the lighter weight, higher capacities, and faster discharge rates of these batteries are great for drones.
LiPo batteries are more volatile so you have to be more careful when storing and handling them so as to avoid the risk of fire.
Charger – there are a number of interesting charger designs, most with the aim of charging multiple batteries quickly and conveniently. This is important as you will need 2 or 3 batteries if you want a good length flying session.
Propellers – provide lift and thrust for the drone. Different types of propellers have different characteristics in terms of noise, speed, and flight time. Check out the options available for your model.
Flight controller (FC)– consider this the flight computer which takes inputs from the pilot and controls the motors. The FC can be sending many different signals per second to each motor independently.
Motors – each motor rotates a single propeller. Drone motors are rated by kilo volts – they higher the rating, the faster the motor.
Frame – the platform on which most major components of the drone sit. The frame must be light (to maximize flight time), strong (to withstand flight loads and crashes) and stiff (to minimize vibrations). If you are building a drone, you need to check frame compatibility with any desired componentry.
Electronic speed controller– there is one of these units per motor, each of which picks up signals from the flight controller and relays them to the corresponding motor.
Gimbal – a system that maintains the camera at a horizontal position by isolating it from the drones movements. For example, the drone could tilt to the right but the gimbal, through a system of servos and motors, would keep the camera horizontal. The main advantage of this is smooth video footage. See this article for the best camera drones, all of which feature gimbals to ensure smooth footage.
Check out this article for further explanation of what is gimbal is, and why they are useful.
Transmitter – control unit that converts and sends your commands (from the sticks and buttons) through the antennae to the receiver on board the drone.
Receiver – picks up signals from the transmitter and relays them to the control system on board the drone.
How to fly a drone – Safety precautions and tips
- Stand well back from drone when taking off incase it veers off (can happen with IMU interference)
- Stand well back from drone as it lands and don’t pick up until propellers have shut down. Keep other people, kids and pets behind you and the controller.
- Ensure ground is even so as to avoid propeller damage and ensure drone takes off in a straight line!
Before flying
Where to practice fly a drone
Follow the checklist below when looking for an ideal site to start out practise flying your drone:
- Only fly in wide open areas with no overhanging tree branches
- Fly away from people
- Fly away from power lines
- Fly away from nesting birds
- Keep away from birds of prey (seriously!)*
- Ensure that there are no large metallic structures nearby (can cause interference)
- Try to keep away from densely populated areas (home wi-fi interference)
*Birds on prey ARE NOT a drone pilots friend:
Environmental checks
Whether you are looking for a practice site or you are an experienced pilot, you should check out the conditions and the local flying area – we refer to this as performing ‘Environmental checks’:
Use a site called Uavforecast.com to check conditions where you are:
- Gust speeds
- Cloud cover
- Visible satellites (for GPS drones)
- Visibility
- Precipitation
Environmental checks:
- Look out for low cloud – cloud base should be higher than 500 ft. Bookmark this calculator on your phone and use to check for low cloud – omnicalculator
- Low wind speed – 32 km/h is a good rule of thumb. A lot of drones can fly in much higher speeds, but it really pays to maintain a good safety margin. Wind speed generally increases with altitude, and gusts are unpredictable and much faster
- Be familiar with local regulations for national parks, public gatherings, airports and so on
- Look out for birds of prey as they are a common cause of downed drones!
- Avoid areas with nesting birds as the mommy birds can get protective!
- Ensure light levels are sufficient, and will not diminish too low during flight. Drone sensors function poorly in low light
- Look out for overhead cables, tall trees and any other possible obstructions on the flightpath. Cables and branches can be too thin to be detected by your drones collision sensors – this is a problem if using automatic return-to-home mode
- Look out for sources of interference – tall metallic structures, telecommunications masts, wi-fi (in built up areas)
Equipment checks
Equipment checklist:
- Propeller safety – check for warping and/or damage. Check prop’s securely fitted
- Ensure firmware is up to date
- Remove any lens covers and gimbal clamps
- Look for obstructions and foreign objects around props, motors, and gimbal
- Ensure drone is on level ground so the gyro(s) can initialize properly
- Ensure camera lens, sensor faces, are cleaned/wiped with lint-free cloth
- Check battery securely attached
- Check SD card installed correctly and has free storage available (can usually check in drone app)
- Attach ND filter and/or polarizer if desired
- Extend/unfold transmitter aerials
- Check drone shell, motor casings, frame, and undercarriage for cracks or damage
Systems check

The following systems check is essential prior to take off. Most issues we’ve experienced in flight have been related to items on this list.
Systems checks:
- Slow down gimbal speed if shooting video (standard settings are often too fast)
- Calibrate compass
- Check drone, transmitter, and viewing device (phone/tablet) batteries are fully charged
- Pair transmitter to aircraft and check connection
- Pair transmitter to phone/tablet
- Ensure minimum number of satellites are locked (usually around 10)
- Ensure the minimum number of bars are showing for GPS signal strength
- Check signal strength on selected channel. Look for high interference on nearby channels
- Check compass interference
- Calibrate IMU (Inertial Measurement Unit) if needed
- Check status of sensors
Pre-flight checklist
Pre-flight:
- Check conditions on Uavforecast.com again
- Define flight routes and take-off and landing points
- Walk through flight route and check for obstructions
- Set failsafe return-to-home altitude higher than visible obstacles (on applicable drones)
- Set homepoint (on applicable drones)
How do I Learn to Fly a Drone
Take off
It’s important to get into the habit of following this routine after take-off, as a lot of potential problems can be spotted before you fly off into the distance:
Take-off:
- Climb to 10-15 foot to avoid propeller wash and to keep a safe distance from people
- Hover for at least 30 seconds
- Look for excessive drifting (if GPS drone)
- If non GPS drone, use time controls to correct any drifting not caused by wind
- Check signal strength on selected channel. Look of for high interference on nearby channels again
- Check Compass interference again
- Check homepoint set (on applicable drones)
- Off you go!
Key skills
Tip
Make sure the drone is in a stable hover before attempting any maneuvers.
Tip
Before attempting any manoeuvres, take your drone up to a safe altitude – minimum 10-15 feet, or 10 feet higher than any nearby obstacles.
Hovering
If you have a GPS drone, it will simply hover any time you let go of the sticks. If you don’t, then you will have to use the controls to slow the drone down and center it, whilst making any needed corrections with the sticks. The other point to bear in mind is that you will often lose altitude when manoeuvring a non-gps drone, so you often have to keeping adding more throttle
Move between points
Focus on moving the drone in one direction at a time. Slowly move the right stick forward/back/right/left and observe how the farther you push the stick, the quicker the drone moves in that direction. Pick an imaginary point in the sky (I use cloud features) and fly to the point, before flying back to the start position using just the right stick.
NOTE:– if your drone doesn’t have GPS, you will have to pull the stick back in the opposite direction to slow and stop the drone.
Yawing/rotating
A good exercise is to fly to a point by tilting the right stick (as above), then move the left stick left or right to rotate (or ‘Yaw’) the drone to face the direction you will next travel in. Then tilt the right stick to send you in that direction. Follow this fly-stop-rotate-repeat drill a few times, and you will start to get a feel for using both sticks.
Flying whilst facing in another direction
A progression of the previous exercise which can be useful for panning shots when capturing video. Rotate the drone (using the left stick, remember!) to face a subject or object and then gently tilt the right stick to fly the drone parallel to the said subject.
Flying exercises
Fly in a circle
Follow the guidance in the video below to learn how to fly in a circle around an object:
Figure 8
This is great exercise for learning how to keep your drone facing in the direction of flight, which is important when racing or capturing video.
Simply tilting the right stick sends the drone off in that direction, no matter which direction the drone is facing. Flying so that the drone is facing in the direction of flight needs simultaneous left and right stick control. You will need to tilt the right stick in the direction that you wish to fly while tilting the left stick left or right to rotate (yaw) the drone to face the direction of travel.
As you change direction with the right stick, you will also need to simultaneously move the left stick right or left to keep the drone facing the direction of travel. Flying in a figure of 8 pattern is a great way to drill this technique.
Advanced flying exercises – How to fly a drone like a pro
Reversed controls
The object of this exercise is to get a feel for how the drone behaves when facing towards you. Some of the controls are reversed, which is confusing, but this will happen often, so get used to it!
Take off and ascend to the recommended altitude as before, and rotate/yaw the drone to face you (left stick remember). Practice tilting the right stick to pitch and roll your way to designated points (I use clouds or background features), but this time note that you have to tilt the stick in the opposite direction of the way you want to travel. This will take some getting used to.
Once you are comfortable with this, make sure the drone is facing you again and bring in some yaw/rotation by tilting the left stick right and left. You will find that, the controls are reversed (as before).
You can then bring in the throttle (up/down on the left stick) and vary the altitude as you fly around. You will notice that the throttle controls ARE NOT REVERSED…phew!
Finally, yaw/rotate the drone to face away from you and fly as we did in the earlier exercises. Once you are comfortable with the way the controls reverse depending on the direction the drone is facing, and you can flip between the two, you can give yourself a pat on the back! Onto the next exercise….
Figure of 8 plus throttle
Follow the previous ‘Figure of 8’ drill whilst tilting the left stick up or down to increase/decrease throttle which will increase/decrease altitude. Try and complete the figure of 8 whilst continuously changing altitude. Once you have done this a few times, you will have been operating all of the main flight controls at the same time and moving the drone through all 6 degrees of freedom. See below for explanation:
Tips when flying
Tips in the air
- Aim transmitter antenna at drone at all times
- Use a battery safety margin to determine when you turn around and head home. Your margin (% of the battery gauge) should be calculated based on the conditions. If the wind speed changes, or frequency and/or intensity of gusts increase, you’ll want enough battery to make it back. It’s possible that your drone can be faced with an easy trip out, but much tougher trip back due to changed conditions, so you can increase the battery safety margin.
- If you’re struggling to get back in time, or battling against adverse conditions, I find that switching to sport mode (on applicable products) and ‘punching it’ can help cover the ground much faster and get your drone back in range. If the worst case occurs, at least you have a better change of the drone being in range for you to go and recover
- If you experience electromagnetic interference; center the sticks to stabilize the drone. If you are hard over on the sticks, your drone will often continue in that trajectory….
Flying in wind
Wind can be a real problem when flying, especially if you have a light drone. The biggest issue issue is that flying against wind drains extra power from your battery. You should always add some buffer time to your flight plans to account for unexpected wind so that you don’t run out of battery. You should also check uavforecast to get a forecast on expected gust speeds when planning your flight..
If your best laid plans don’t work out, and you get caught out by some strong, sustained wind – hit sports mode (maybe called ‘turbo mode’ or similar on your drone) and blast your way out of trouble. Often times a quick blast in sports mode is a more efficient way of escaping strong winds.
Conclusion
We hope that you have found this guide useful, feel free to print out sections of this guide and take them with you on your flights. I have the checklists from this article saved on my phone, and use them every time before taking to the skies.
When learning how to fly, It may seem that there are too many things to check on the pre-flight lists, but after a while they become second nature so you only need a quick scan down each prior to flight.
Before flying drones I would read horror story after horror story online about fly aways, but following these lists before each flight has meant that I’ve only experienced A SINGLE flyaway on ANY of the drones I’ve ever flown.
Running through the drills in this guide over and over will really help your flying skills. Once you’ve cracked these, you have all the skills you need to fly really well, and then it’s only case of stringing these techniques together.
As always, drop us a line on the contact page contact page if you have any comments or questions you’d like answered.
Happy flying!